
Master Your Home Plumbing Inspection with Modern Technology
The evolution of home maintenance has taken a significant leap forward with the introduction of plumbing camera technology. These sophisticated devices have transformed how homeowners approach pipe inspection and maintenance, making it possible to identify potential issues before they become costly disasters. Understanding how to effectively use a plumbing camera can save you thousands in preventive maintenance and help you make informed decisions about your home's plumbing system.
Today's plumbing cameras are more accessible and user-friendly than ever before, enabling homeowners to perform thorough pipe inspections without professional assistance. This comprehensive guide will walk you through everything you need to know about using these innovative tools effectively and safely in your home.
Essential Components of a Plumbing Camera System
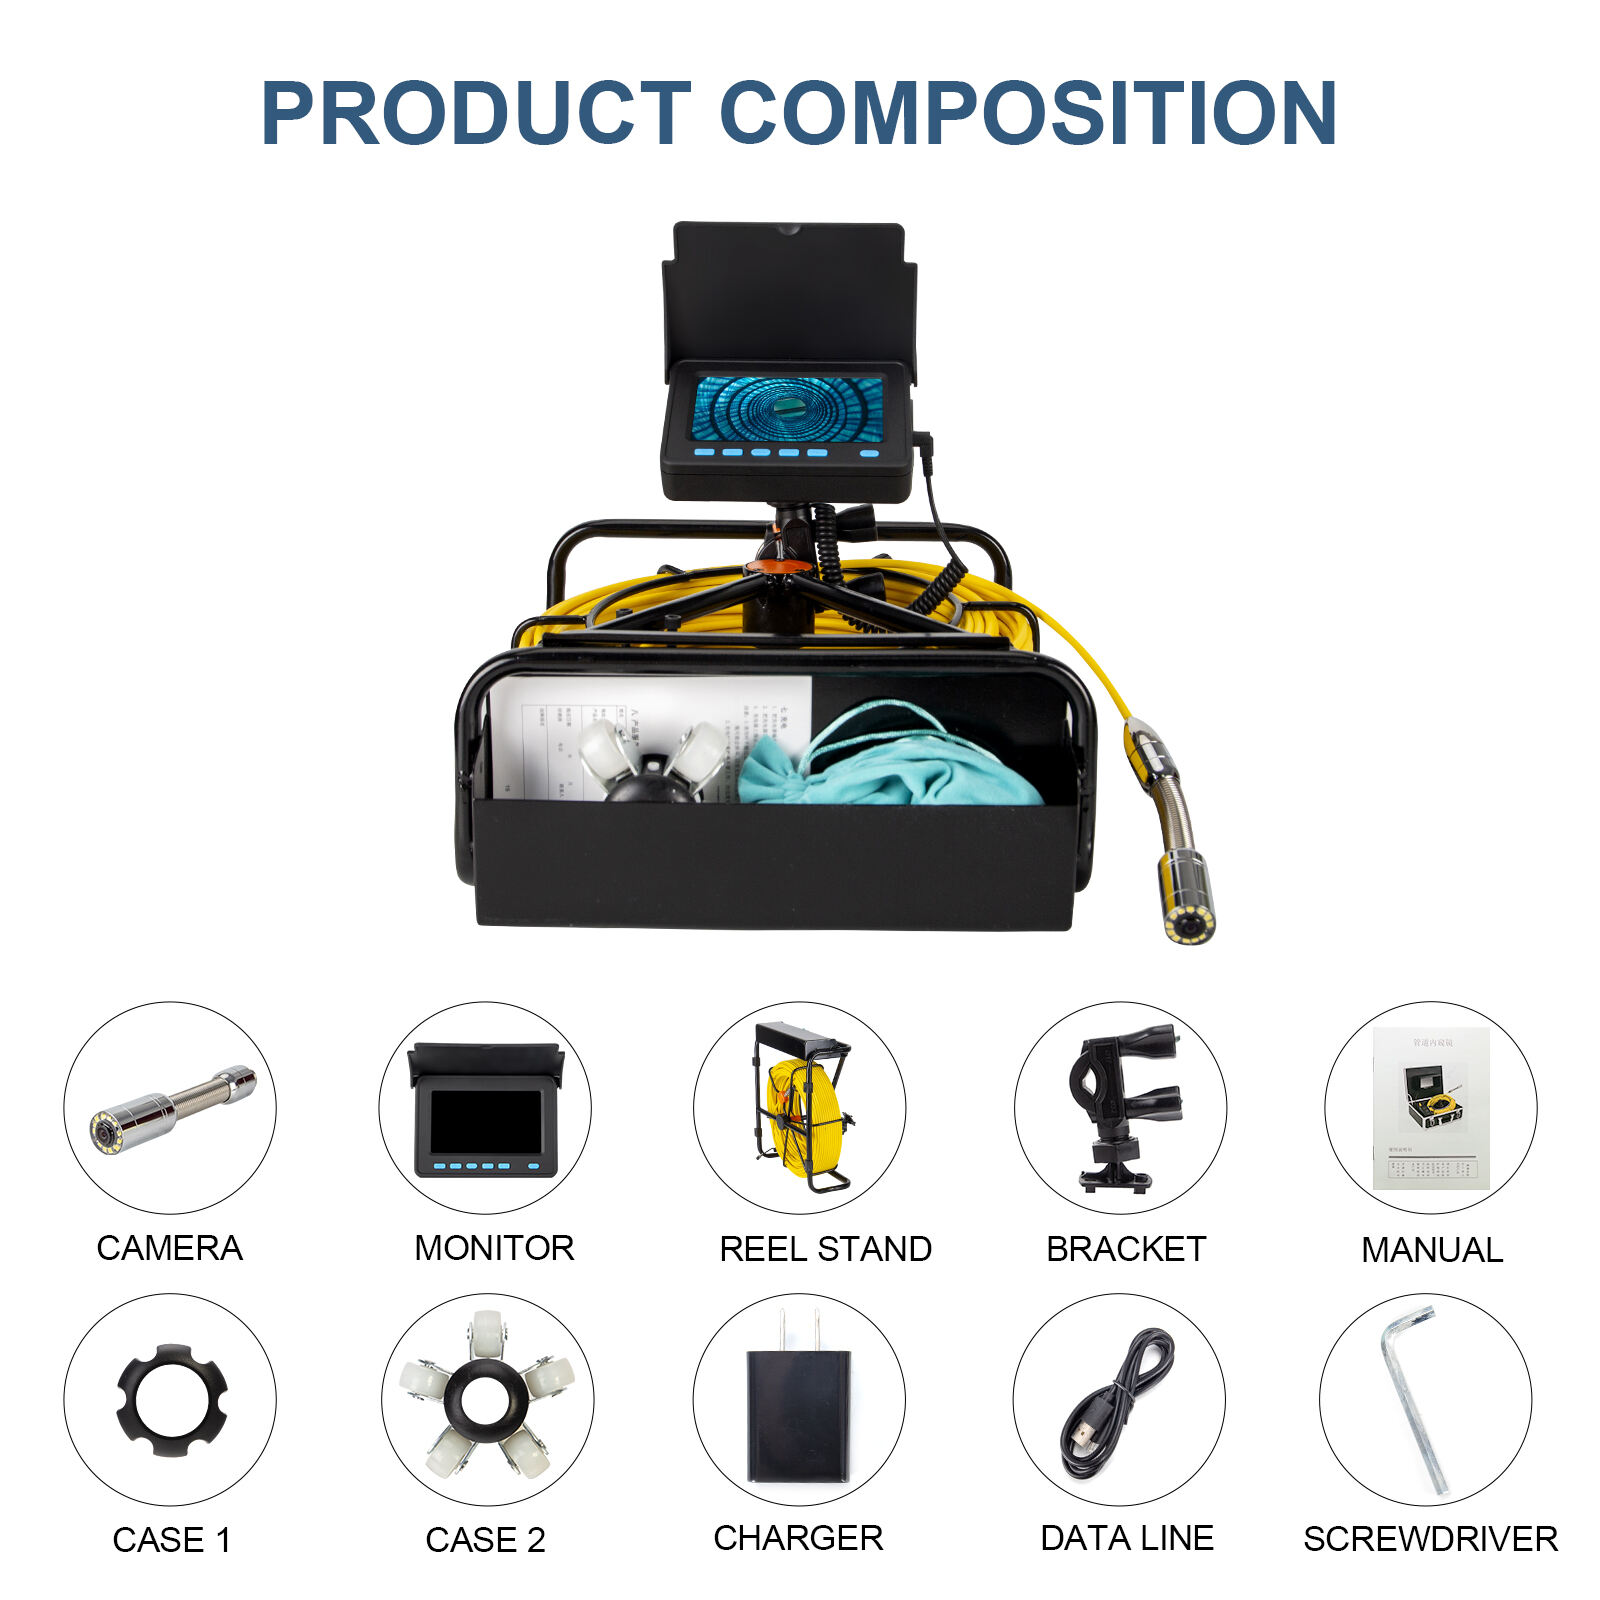
Understanding the Camera Unit
At the heart of every plumbing camera system lies the camera unit itself. These waterproof cameras are typically equipped with bright LED lights and are designed to transmit clear images through dark pipes. The camera head is usually made of durable materials that can withstand the harsh environment inside plumbing systems while providing high-resolution footage of pipe conditions.
Modern plumbing camera systems often feature self-leveling capabilities, ensuring the image stays upright regardless of how the cable turns within the pipe. This feature makes it significantly easier to interpret the footage and identify potential issues accurately.
Cable and Control Features
The flexible cable that connects the camera to the monitor is engineered to be both rigid enough to push through pipes and flexible enough to navigate bends and turns. Most residential plumbing cameras come with cables ranging from 50 to 100 feet in length, suitable for most home inspection needs.
The control unit allows you to manage the camera's movement and lighting intensity. Many systems also include distance counters to help you pinpoint exactly where problems are located within the pipe system, making future repairs more efficient.
Preparing for Your First Pipe Inspection
Initial Setup and Safety Measures
Before beginning your inspection, ensure you have a clear access point to the plumbing system. This might be through a cleanout, removed toilet, or open pipe. Always wear protective gloves and eye protection, as you'll be working with potentially contaminated surfaces. Position your monitoring screen in a stable location where you can easily view it while manipulating the camera.
It's crucial to clean your work area and have cleaning supplies ready for the plumbing camera equipment after use. This maintains the longevity of your investment and ensures hygienic conditions for future inspections.
Mapping Your Inspection Route
Create a simple diagram of your home's plumbing system before starting. This will help you navigate more effectively and document any findings. Mark key junction points, suspected problem areas, and the planned entry point for your inspection. Understanding your plumbing layout in advance can save significant time during the actual inspection process.
Conducting the Pipe Inspection
Navigation Techniques
Inserting and guiding a plumbing camera requires a gentle but firm touch. Start by slowly feeding the cable into the pipe, keeping the camera centered as much as possible. When you encounter bends or joints, use slight rotating motions to help the camera head navigate through them smoothly. Pay attention to the resistance you feel - forcing the camera could damage both the equipment and your pipes.
As you move through the system, maintain a steady pace that allows you to thoroughly examine pipe walls, joints, and potential problem areas. The goal is to be thorough without missing important details.
Identifying Common Issues
During your inspection, be alert for signs of common plumbing problems. Look for cracks, root intrusions, mineral buildup, or misaligned joints. Pay special attention to areas where water might pool due to improper slope or pipe damage. Document any findings with timestamps or distance measurements for future reference.
Analyzing and Documenting Findings
Recording and Storing Footage
Most modern plumbing camera systems allow you to record video and capture still images of your inspection. Take advantage of these features to document any issues you discover. Create a detailed log of your findings, including the location, type of problem, and severity of any damage observed. This documentation will be invaluable for tracking changes over time or communicating with plumbing professionals if repairs are needed.
Interpreting Results
Learning to interpret what you see through a plumbing camera takes practice. Familiarize yourself with the appearance of normal pipe conditions so you can more easily spot abnormalities. Keep in mind that different pipe materials may look different on camera, and lighting conditions can affect how issues appear.
Maintenance and Care of Your Equipment
Cleaning Procedures
After each use, thoroughly clean your plumbing camera system. Use appropriate cleaning solutions recommended by the manufacturer to sanitize the cable and camera head. Pay special attention to the camera lens, ensuring it's clear and unobstructed for future use. Proper cleaning not only maintains hygiene but also extends the life of your equipment.
Storage and Protection
Store your plumbing camera system in a clean, dry place, preferably in its original case or a dedicated storage container. Avoid extreme temperatures and humidity, which can damage electronic components. Regularly check cables for wear and tear, and address any maintenance needs promptly to prevent equipment failure during future inspections.
Frequently Asked Questions
How Often Should I Inspect My Home's Plumbing with a Camera?
For preventive maintenance, conducting a plumbing camera inspection once every 18-24 months is recommended. However, more frequent inspections may be necessary for older homes or if you experience recurring plumbing issues. It's also wise to perform an inspection before purchasing a new home or after major renovations.
What's the Typical Cost of a Quality Plumbing Camera System?
Professional-grade plumbing camera systems typically range from $500 to $2,000 for residential use. While this may seem like a significant investment, it often pays for itself by helping identify problems early and avoiding costly emergency repairs. Some hardware stores also offer rental options for occasional use.
Can a Plumbing Camera Inspect All Types of Pipes?
Most residential plumbing cameras are designed to work with pipes ranging from 2 to 6 inches in diameter. They can inspect various pipe materials, including PVC, metal, and clay. However, they may have limitations in extremely corroded pipes or those with multiple sharp bends. Always check the manufacturer's specifications for your specific model.