
Tackling plumbing problems on your own can save significant time and money, but working blind inside walls, floors, or underground lines is one of the biggest challenges any DIY homeowner faces. A pipe inspection camera changes that reality entirely. Instead of guessing where a clog, crack, or misalignment might be hiding, you get a live visual feed directly from inside your plumbing system, allowing you to make informed decisions rather than expensive guesses. Understanding how to use this tool effectively is the key to getting real value out of every inspection.

Whether you are diagnosing a slow-draining sink, tracking down a mysterious wet spot on a concrete slab, or preparing for a renovation that involves rerouting pipes, a pipe inspection camera gives you the visual intelligence to work smarter. This guide walks through the practical side of using this equipment effectively in DIY plumbing contexts, covering preparation, technique, interpretation, and the kinds of situations where this tool truly earns its place in a homeowner's toolkit.
Understanding How a Pipe Inspection Camera Works
The Core Components and Their Roles
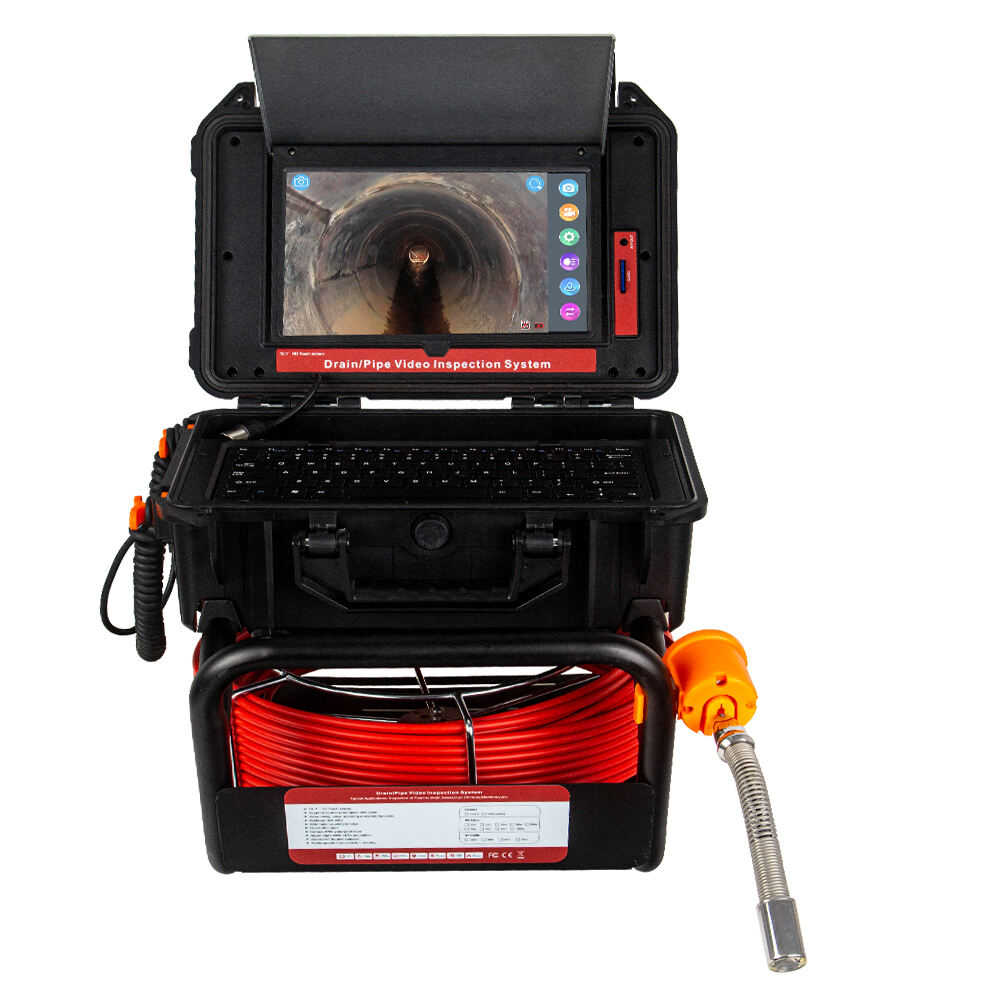
A pipe inspection camera system consists of several integrated components working together to deliver real-time footage from inside your plumbing. At the front end is a waterproof camera head, typically mounted on a flexible push rod or cable that can be fed through bends and straight runs inside pipes. The camera captures continuous video and transmits it back through the cable to a monitor or screen unit that you hold or set nearby while working.
Most modern units designed for DIY and semi-professional use come with a self-contained screen, often a high-resolution display ranging from 7 to 9 inches, which makes it easy to see details even in dim or dirty pipe environments. Built-in LED lights around the camera head illuminate the interior of the pipe, compensating for the complete lack of natural light inside plumbing lines. The quality of those lights and the camera resolution directly impact how accurately you can diagnose issues.
Higher-end models also include a locator transmitter inside the camera head that emits a signal. When used with a compatible surface locator, this feature lets you pinpoint the exact ground or wall position where the camera is sitting underground or behind surfaces. For DIY plumbing, this locating function is particularly valuable when you need to dig or cut into a surface to access a specific problem point.
Image Quality and Display Resolution
The effectiveness of any pipe inspection camera is closely tied to image clarity. A 1080p HD camera head provides significantly more detail than lower-resolution alternatives, making it easier to distinguish between mineral buildup, root intrusion, grease deposits, pipe corrosion, and hairline cracks. When you can clearly see what you are dealing with, you choose the right remedy instead of applying a generic solution that may not address the actual problem.
When reviewing footage on the display, pay attention to color consistency and contrast. A well-lit, high-resolution image will show the interior pipe surface texture clearly, and any anomaly will stand out against the relatively uniform background of a clean pipe wall. Recording capability is another important display feature — being able to save video or still images lets you review the footage later, share it with a plumber if professional help is needed, or document the pipe condition before and after a repair.
Preparing Your Plumbing System Before Inserting the Camera
Cleaning the Line First
One of the most common mistakes DIY users make when first deploying a pipe inspection camera is inserting it into a line that is still full of water, debris, or heavy grease. While these cameras are fully waterproof, murky water and floating debris obstruct the lens and make it nearly impossible to see the pipe walls clearly. Before you begin any inspection, it is worth clearing the line as much as possible.
For drain lines, use a drain snake or run a flushing cycle with hot water to push loose material further down and clear the immediate area you plan to inspect. For sewer lines at the home's cleanout access, flushing with water while the camera is in place can sometimes help carry debris out of the frame. The goal is not a perfectly clean pipe — that is rarely achievable without professional jetting — but rather a line clear enough that the camera lens can make consistent contact with the pipe wall environment rather than floating debris.
Identifying Access Points and Pipe Diameter
Before pushing a pipe inspection camera into any line, confirm that your camera head diameter matches the pipe you are entering. Most residential drain lines run between 1.5 inches and 4 inches in diameter. Kitchen and bathroom sink drains are typically on the smaller end, while main sewer lines run larger. Using a camera head that is too large for the pipe creates resistance, risks damaging the push rod, and can get the camera head stuck.
Locate your cleanout access points before starting. Most homes have a main sewer cleanout located near the foundation or in the basement, which provides the best entry point for inspecting the full sewer line. For branch lines like bathroom or kitchen drains, you may be able to remove the P-trap or access a secondary cleanout. Always choose the access point closest to the section you are trying to inspect — inserting the camera through the nearest practical entry reduces the amount of rod you need to manage and keeps the inspection more controlled.
Effective Techniques for Feeding and Navigating the Camera
Controlling the Push Rod Through Bends
Feeding a pipe inspection camera through a residential plumbing system requires patience and technique, especially when the line includes standard plumbing bends such as 45-degree and 90-degree elbows. Apply steady, gentle pressure rather than aggressive pushing. When the camera encounters a bend, slightly rotating the push rod as you advance often helps the flexible cable navigate around the curve without buckling or kinking behind you.
Pay attention to the footage on the screen as you feed the rod forward. If the image suddenly shows only the pipe wall in extreme close-up, the camera head may have pressed against a wall due to a bend or obstruction. Pull back slightly, rotate the rod, and try advancing again at a different angle. The rod depth marker, available on most quality units, tells you exactly how far you have inserted the camera, which helps you correlate specific footage moments with known pipe layout dimensions.
Reading the Live Image While Moving
Effective use of a pipe inspection camera means keeping your eyes on the screen while your hands manage the rod. This dual-focus approach takes a little practice. Move the camera slowly through the pipe rather than pushing quickly — fast movement causes the image to blur and you will miss subtle indicators like hairline cracks, early-stage root tendrils, or joint separations that are small enough to overlook at speed.
When you notice something on screen that requires closer examination, stop advancing and rotate the camera slightly to view the anomaly from multiple angles. If your unit supports recording, mark that moment or take a still image. Noting the rod depth reading at the same time gives you a precise reference to work from if you need to excavate, cut, or treat that specific location later. A thorough and slow inspection pass is always more useful than a fast one.
Interpreting What the Pipe Inspection Camera Reveals
Common Issues Visible Inside Residential Pipes
Using a pipe inspection camera consistently reveals a predictable range of issues inside residential plumbing. Grease buildup appears as a yellowed or brownish coating narrowing the interior diameter of the pipe, often found in kitchen drain lines close to the sink or further downstream where flow slows. Root intrusion, one of the most serious findings, appears as fibrous white or tan tendrils entering through joint gaps or small cracks, with more advanced intrusion filling large sections of the pipe entirely.
Mineral and scale buildup, particularly in older galvanized steel pipes, shows up as rough, uneven orange or white deposits coating the pipe walls. Pipe joint separations appear as gaps where two pipe segments have pulled apart, often allowing soil ingress visible as dark sediment entry. Collapsed or deformed pipe sections are immediately obvious as the pipe interior narrows severely or the shape becomes irregular. Each of these findings calls for a different remedy, and the pipe inspection camera tells you which problem you actually have before you commit resources to fixing it.
Distinguishing Cosmetic Concerns from Structural Problems
Not every imperfection inside a pipe signals an emergency. Surface staining from mineral-rich water, minor debris accumulation, or slight oxidation at joints are common in older homes and do not necessarily require immediate intervention. Learning to distinguish cosmetic conditions from structurally compromising problems is one of the higher-level skills that comes from regular use of a pipe inspection camera.
Structural concerns include active cracks running along the pipe body, root masses that are blocking flow or expanding joint gaps, sections where the pipe has begun to collapse, and areas where the pipe has separated at a joint enough to allow soil to enter. These findings warrant action. A cosmetic finding like minor iron staining or light surface buildup may simply require periodic maintenance flushing rather than pipe replacement. The pipe inspection camera gives you the evidence to make that distinction confidently and avoid unnecessary repair costs.
Practical DIY Scenarios Where a Pipe Inspection Camera Adds Real Value
Pre-Purchase Home Inspections and Renovation Planning
One of the highest-value use cases for a pipe inspection camera in a DIY context is evaluating the plumbing condition of a home you are considering purchasing, or planning a renovation that involves rerouting or exposing existing pipe runs. Standard home inspections rarely include camera inspection of drain and sewer lines, meaning serious problems can go undetected until after closing. Running your own pipe inspection camera through the main sewer line and key branch drains gives you concrete visual evidence to negotiate with, plan repairs around, or use as a reason to walk away.
In renovation planning, knowing the exact condition and routing of existing pipes prevents costly surprises when walls or floors are opened. If you find that an existing drain line has already partially collapsed or that root intrusion has made a pipe non-functional, you can plan and budget for that work before construction begins rather than discovering it mid-project when timelines and costs are under pressure.
Diagnosing Recurring Clogs and Slow Drains
Repeated clogs in the same line that return after snaking are a strong indicator of an underlying structural issue rather than a simple blockage. Deploying a pipe inspection camera in this situation moves you from symptomatic treatment to root cause diagnosis. You may find a partial pipe collapse that catches debris on every flush cycle, a root intrusion point that regrows quickly after mechanical clearing, or a belly — a low point where the pipe has sagged and pooled water — that creates a recurring trap for solids.
Without the pipe inspection camera, you might snake the line multiple times over several months, paying for temporary relief each time. With one visual inspection, you identify the actual source of the problem and address it properly, whether that means pipe lining, section replacement, or a targeted root treatment. This approach is both more economical and more permanently effective than repeated blind interventions.
FAQ
Can I use a pipe inspection camera in all types of household pipes?
A pipe inspection camera is compatible with most common residential pipe materials including PVC, ABS, cast iron, clay, and galvanized steel, provided the camera head diameter fits the pipe interior. Always match the camera head size to the minimum pipe diameter in the section you are inspecting. Very small lines like washing machine drain hoses or narrow supply lines may be too small for standard camera heads and should not be forced.
How do I deal with standing water in the pipe during inspection?
Standing water is a common challenge when using a pipe inspection camera in partially blocked or slow-draining lines. If the water is clear, the camera can often still provide a useful view along the bottom of the pipe. If the water is dark and murky, flush the line first to move the debris and lighten the water. Some inspectors insert the camera while running a slow trickle of water to keep the lens clean as it moves through the line.
How far can a DIY pipe inspection camera typically reach?
Most consumer and prosumer-grade pipe inspection camera systems come with push rod lengths ranging from 20 meters to 40 meters, which is sufficient for most residential sewer line inspections from a cleanout access to the municipal connection. Longer rod lengths are available for municipal and commercial applications. For typical DIY residential use, a 30-meter rod covers the full sewer run of most single-family homes comfortably.
Is professional training required to use a pipe inspection camera effectively?
No formal certification is required to use a pipe inspection camera for personal DIY plumbing work. The learning curve is manageable with practice. Most users become reasonably proficient after a few inspection sessions. The more challenging skill is accurate interpretation of what you see on screen, which improves with experience and by reviewing reference images of known pipe conditions. For high-stakes decisions like pre-purchase inspections, supplementing your own inspection with a professional evaluation remains a sensible precaution.